Documenting roof damage after a Denver storm isn’t just helpful it can make or break your insurance claim.
When hail, high winds, or heavy snow sweep through the Front Range, the aftermath isn’t always obvious from the ground. What might seem like minor cosmetic wear can lead to major leaks, structural issues, or claim denials if not documented properly. That’s where photos come in but not just any quick snapshots.
This guide walks you through how to capture the right photo evidence, at the right time, with the right framing and context so your insurer doesn’t have any room to push back. Whether you’re dealing with hail-damaged shingles, torn flashing from wind gusts, or ice damming from snowmelt, the goal is the same: prove the damage clearly and convincingly.
You’ll learn what to photograph, how to show the extent of storm impact, and how to pair your visual proof with timestamps and supporting context that align with your policy requirements.
Let’s make sure your roof tells the full story and your insurance company listens.
Why Proper Photo Evidence Matters in Denver Storm Claims
Getting your roof insurance claim approved in Colorado isn’t just about saying a storm hit it’s about proving what that storm actually did. And in most cases, that proof starts and ends with your photos.

How Insurance Companies Evaluate Roof Damage Photos
When you file a storm-related roof claim, your insurer doesn’t take your word for it. Adjusters use a combination of photo evidence, weather data, and third-party inspection reports to decide whether the damage qualifies for coverage.
In Denver and across the Front Range, they often pull data from NOAA storm reports to verify if hail, wind, or snow events happened in your ZIP code on the date of loss you listed. Then they compare your photos to what’s typical for that storm type — bruised shingles from 1-inch hail, lifted edges from wind bursts, or cracked tiles from freeze-thaw cycles.
If your photos don’t clearly show storm impact, or if they’re missing timestamps, your claim can stall fast. In some cases, insurers may also request documentation from your roofing contractor or rely on a second adjuster to verify the extent of damage often weeks later.
Here’s how Colorado’s own Department of Regulatory Agencies (DORA) puts it:
“It’s important that consumers collect detailed documentation of any storm-related damage. This helps insurers evaluate claims faster and can support policyholders if disputes arise.”
— Colorado DORA, Consumer Protection Division
In short, your phone camera may be the single most important tool you have for claim approval.
What Can Happen Without Good Documentation
No clear photos? You’re giving the insurance company every reason to slow-walk or reduce your claim. Here’s what can (and often does) happen:
- Denied claims because damage is called “wear and tear” or “pre-existing”
- Delayed approvals as adjusters ask for more proof or order a second inspection
- Lower payouts due to “inconclusive evidence” or disputed repair scope
Even in storm-heavy areas like Aurora, Thornton, or Lakewood, insurers won’t assume damage just because there was a storm. They need to see it. That’s why a solid photo checklist taken soon after the storm is your best defense.
What Kinds of Storms Commonly Damage Denver Roofs

Most Common Roofing Damage from Hail & Wind
Hail and wind are the two most destructive storm types for Denver roofs. Each leaves behind different signs and both can weaken your roof in ways that aren’t always obvious at first glance.
Hail damage typically appears as bruised or fractured shingles, pitted metal flashing, or cracks in clay or concrete tiles. The impact can loosen granules from asphalt shingles, exposing the mat underneath and shortening the roof’s lifespan.
Wind damage, by contrast, involves lifted flashing, dislodged shingles, and even missing roof sections on the windward side. High-speed gusts can also create pressure pockets that pull up roof edges or blow debris into vulnerable areas.
Localized example: In June 2023, NOAA reported a severe hailstorm affecting parts of Aurora, Lakewood, and Littleton, with wind gusts over 70 mph and hailstones exceeding 1.5 inches. Damage reports spiked in the days following mostly involving cracked shingles, blown-off ridge caps, and water seepage in attics.
How Quickly Damage Can Worsen Without Repairs
Roof damage accelerates quickly when left untreated. Even small breaches can let moisture in beneath the roofing membrane or underlayment.
Once water penetrates, it can cause insulation rot, interior ceiling stains, and mold growth inside your attic or walls especially during Denver’s freeze–thaw cycles and spring rain events.
More importantly, insurance providers often deny or reduce claims if the damage isn’t clearly tied to a specific storm or if it’s allowed to worsen due to delays. That’s why it’s critical to act early. The best first move? Photograph the damage immediately.
When to Take Photos After a Storm

The Best Timeframe for Documentation
The ideal window to take roof damage photos is within 24 to 48 hours after a storm ends. That’s when the evidence is freshest and before any cleanup, emergency tarping, or natural erosion alters what adjusters might later inspect.
Use this moment to photograph:
- Wide-angle shots showing the entire roof and visible debris
- Close-ups of impacted areas, like hail dents, torn flashing, or missing shingles
- Granules or shingle fragments in gutters or around the property
Before and after comparisons can be especially powerful, so if you have pre-storm images (from real estate listings, inspections, or past appraisals), use those to highlight changes.
Can I Take Photos After Repairs Have Started?
Yes, but the documentation will be limited. Once roofing crews begin replacing materials or removing debris, it becomes harder to prove the full scope and timing of the damage.
Still, there’s value in post-repair photos. You can:
- Show areas where damage previously existed
- Highlight missing or incomplete repairs
- Request in-progress photos from your contractor
Most reputable Denver roofing companies will document their work for insurance submission and you’re entitled to request copies. Having those images on hand strengthens your ability to negotiate a full, fair claim.
Roof Damage Photo Checklist for Insurance Claims

A roof damage photo checklist is your first line of defense when dealing with insurance adjusters. These images aren’t just for record keeping they’re proof. Clear, time-stamped photos can help validate the scale and cause of the damage, protect against lowball offers, and speed up the claims process.
Must Have Photos for Every Homeowner
The right photos can make or break your claim. Here’s what every homeowner should document after roof damage ideally on the same day or as soon as it’s safe:
- Wide shots of the entire roof from multiple angles (front, back, and sides). This gives adjusters a full context of the damage.
- Close-up images of visible issues—like torn shingles, dented flashing, cracked vents, or sagging gutters.
- Photos of debris or damage on the ground, such as broken tiles, large hailstones, or tree limbs.
- Interior signs of damage, especially in the attic or top floor ceilings look for stains, bubbling paint, or active leaks.
- Time-stamped or metadata-enabled images, which help verify when the damage occurred.
If you’re unsure how to angle these shots, it’s better to over-document than miss a key area.
Bonus Tips That Help Support Your Claim
Beyond standard roof images, a few smart extras can strengthen your file:
- Use a coin or ruler in hail photos to show the size of impact points insurers often have thresholds for severity.
- Take a selfie showing the damaged roof in the background. This proves location, date, and personal verification.
- Screenshot the local weather report (especially from apps like RadarScope, Weather Underground, or NOAA) on the day of the event.
These aren’t gimmicks they’re strategic. They help tell a clear, verifiable story to your insurer.
Should You Get Professional Help or DIY the Photos?
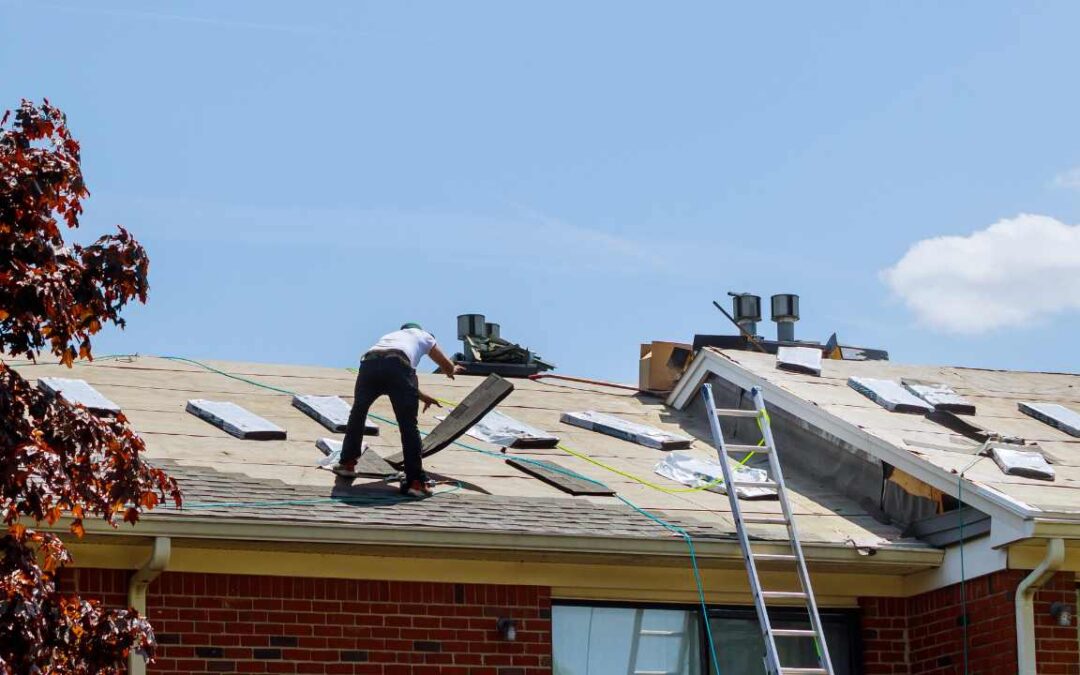
Is It Safe to Go on the Roof After a Storm?
No, it’s not safe to climb on your roof after a storm. Even if the surface looks stable, hidden structural damage can lead to collapse or falls. Wet shingles, wind-lifted panels, or ice can create serious slip hazards.
If you feel the need to capture roof-level shots:
- Stay on the ground and use a zoom lens or pole camera.
- Use a drone only if you’re experienced or hire someone who is.
- Never risk personal injury for documentation—that’s where inspectors or contractors come in.
When to Hire a Roof Inspector or Public Adjuster
Bring in a professional if the damage is extensive, unclear, or disputed. Here’s when a third party becomes critical:
- You see signs of damage but can’t pinpoint the extent.
- Your claim is large or may involve a total roof replacement.
- Your insurer is slow to respond or tries to minimize the payout.
A licensed roof inspector or a public adjuster can document the damage independently and negotiate on your behalf. If you’re already working with a contractor or roofer in St. Louis or your local area, ask if they provide storm inspection reports suitable for claims. Many roof inspections in St. Louis include photo documentation and repair estimates, which gives you leverage if the insurer lowballs you.
How to Organize & Submit Your Photos for a Claim

Best Practices for Sharing With Insurance
Digital clarity wins. Most insurers now accept photo submissions through an online portal or email. To streamline the process:
- Label each file clearly (e.g., “NorthRoof_Wide_Damage1.jpg”).
- Include a brief note with each group of images that explains what’s shown, where it is on the property, and when it was taken.
- Avoid sending blurry or duplicate images—clarity builds trust.
If you’re filing online, check your insurer’s photo format requirements some require JPG or PDF, and size limits may apply.
How to Back Yourself Up in Case of Disputes
Keep a backup copy of everything you send. You don’t want to be caught off guard if your claim is denied or contested.
- Store images on a cloud drive or USB labeled by date and claim number.
- Save all communication with your insurance company, contractor, and public adjuster. This includes emails, call logs, and inspection reports.
You’re not just submitting evidence you’re building a timeline. That kind of documentation becomes essential if the claim goes to mediation or legal review. It’s worth reading through a guide to disputing denied roof claims if your insurer pushes back. The right documentation is your best defense.
Common Mistakes That Delay Roof Damage Claims
Getting your insurance payout often comes down to what you show and what you miss. Homeowners often think they’ve documented enough, only to hit a wall when the adjuster asks for something they didn’t include. Let’s break down the common missteps so you don’t fall into the same traps.

What to Avoid When Photographing Damage
Blurry, low-light, or inconsistent photos are the most frequent reason for claim delays. Insurers can’t assess what they can’t see clearly. If the lighting is poor or photos are taken in a rush, it’s not just unhelpful it can actually hurt your claim.
Another mistake? Incomplete angles or lack of scale. Taking just one side of the roof or zooming in too far without context won’t cut it. Adjusters want a full picture literally. Always aim to include multiple angles and distance shots along with close-ups.
Many people also forget to document damage inside the home, especially in attics or upstairs ceilings. Signs of water intrusion like brown stains, warped paint, or bubbling drywall often reinforce your claim, especially when roof leaks are hard to detect from the outside.
If you’re unsure what to include, consider referencing visual examples on your insurer’s website or speak with a local roofing expert. At Abraham Benson Roofing, we help walk homeowners through the documentation process from the start.
What Homeowners Wish They Knew Earlier
There’s no shortage of regret-filled stories from forums like r/HomeInsurance, r/Roofing, and even r/Denver. These real-world posts offer hard-earned wisdom from homeowners who learned things the painful way.
One user shared:
“The adjuster denied part of my claim because I didn’t have pics of the hailstones themselves. I didn’t know I had to do that.”
Another admitted:
“I only took photos of the roof itself not the gutters or the vents. Turns out the vent caps were the most damaged.”
These are simple oversights, but they can make the difference between a full payout and a frustrating appeal. If you’re in the early stages of inspection, take 10 minutes to read others’ stories they’ll teach you more than any generic checklist ever could.
And if it all feels overwhelming, getting a professional roof inspection right after the storm can save you a ton of hassle. You won’t just get the right photos you’ll have the right language to back them up when it’s time to file.
Final Checklist Recap: Do This Before Filing
Before you hit submit on your insurance claim, take a minute to run through this quick checklist. These steps might seem simple, but missing just one of them can slow down your claim or worse, lead to a denial.
Take both wide-angle and close-up photos
Capture the full roof from every side, plus detailed shots of damaged shingles, vents, gutters, and flashing.
Document interior and exterior damage
Don’t stop at the roof snap attic insulation, ceiling stains, soggy drywall, or any leaks showing inside.
Label and date every photo
Use your phone’s metadata, or include a visible timestamp or weather screenshot to verify the damage date.
Don’t delay your report
Submit your documentation within 24–48 hours of the storm if possible. Late claims can raise red flags.
Get a second opinion if needed
If the damage seems borderline or if you’ve been denied before consider bringing in a roof inspector or public adjuster for backup.
Once you’ve covered these basics, your photo evidence will be far more likely to hold up under adjuster review. If you’re unsure how to send everything properly, check the submission tips above for help organizing your files.
Next Steps if You Suspect Roof Damage
If you’ve worked through the checklist above and still aren’t sure what you’re seeing, the smartest next move is to get a second set of trained eyes on the roof. A licensed local roofer can confirm whether what you photographed lines up with storm-related damage and whether it’s worth moving forward with a claim. This step often saves homeowners from filing claims that don’t meet coverage thresholds or missing damage that isn’t obvious from the ground.
In more complex situations such as widespread hail damage, a high-dollar claim, or pushback from the insurance company you may also want to consider a public adjuster. Public adjusters work for homeowners, not insurers, and can help interpret policy language, document damage, and negotiate scope if there’s disagreement. This isn’t necessary for every claim, but it can make a real difference when the stakes are high.
If you’re unsure how to interpret what you’ve documented or want help understanding what your photos actually show, working with a trusted local roofing professional can bring clarity. You can learn more about how Abraham Benson Roofing supports Denver homeowners after storms by starting here.
Recent Comments