Post-hailstorm homeowner action steps are a time-bound sequence of safety checks, impact verification, damage documentation, temporary mitigation, insurance notification, and inspection coordination completed within the first 0–48 hours after a hail event.
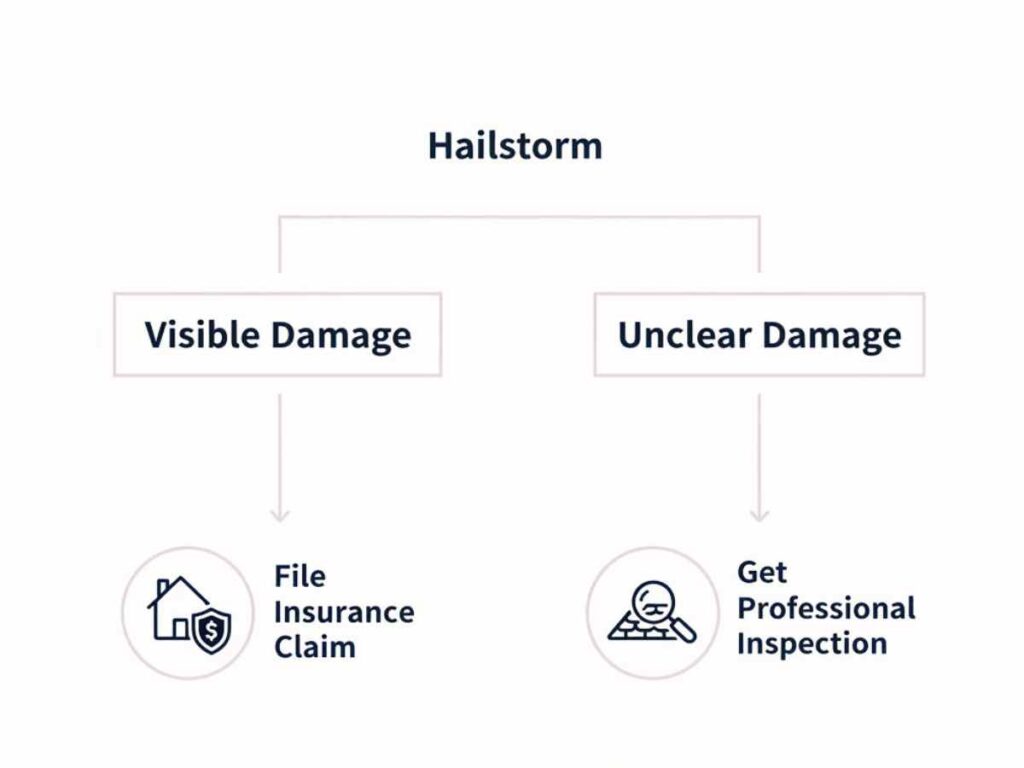
Hailstorms along the Front Range often follow narrow paths, crossing neighborhoods along the I-25 or E-470 corridors while leaving nearby streets largely untouched. One home may show dents in roof vents, gutters, and window screens, while a house a few doors down shows little visible impact. That variation is why the first step is confirming whether your specific property was hit.
The first hours after a storm are not about deciding on repair or replacement. They are about confirming impact, capturing visible conditions, and stopping active water entry if it exists. When damage is not documented early, details can be missed or disputed later during an insurance inspection, especially if surfaces change or temporary repairs are made without a record.
The steps that follow move in a clear order, starting with safety, then ground-level verification, documentation, and early decision points tied to what you actually find.
Immediate Timeline: What to Do in the First 0–48 Hours in Metro Denver
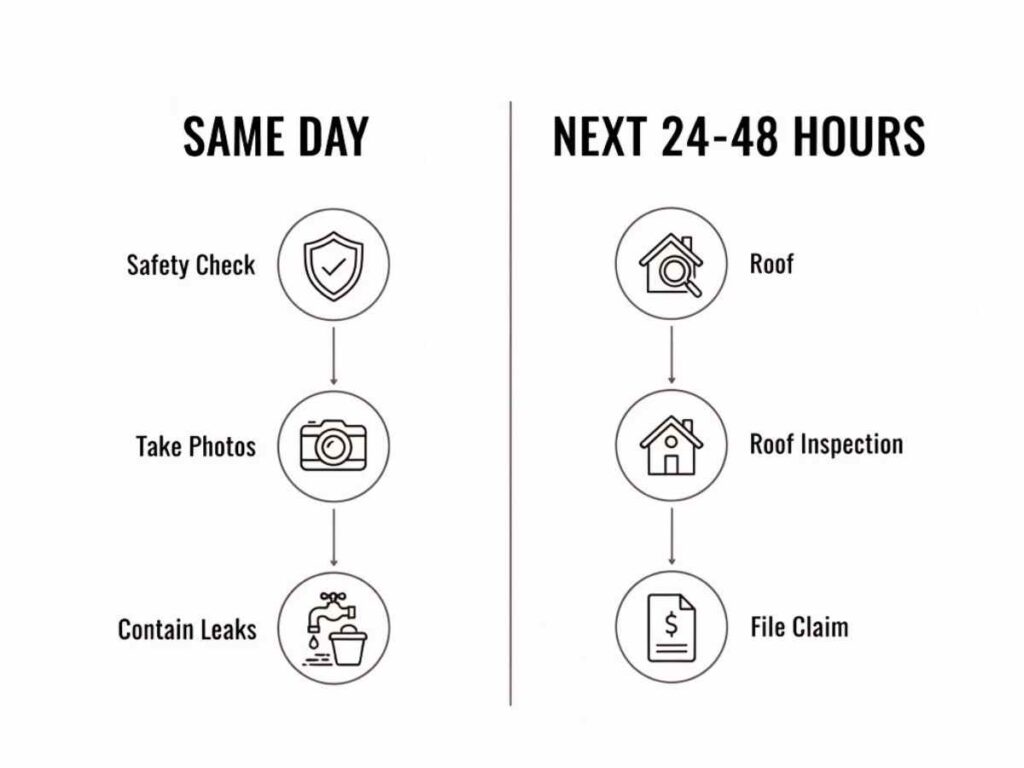
The first 0–48 hours after a hail storm follow a clear sequence: confirm safety and impact the same day, then move into mitigation, claim initiation, and inspection scheduling over the next one to two days. In Metro Denver, that sequence matters because storm paths are often narrow, and damage can vary significantly across the same neighborhood.
Same-day actions focus on confirming what actually happened at your property. Start at ground level. Check soft metals like gutters, downspouts, and roof vents for dents, then look at siding, window screens, and painted surfaces. If water is entering the home, contain it immediately and note where it is showing up. Take photos while conditions are unchanged, including wide shots of each elevation and close-ups of visible impact. These early observations establish whether further inspection is needed and preserve what the storm left behind before anything shifts or dries. (NRCA guidelines)
The next 24–48 hours shift toward stabilization and decision-making. Temporary mitigation comes first if there is active leaking, such as placing a tarp from the ground or inside the structure where accessible, or managing interior water. When indicators like dented roof vents, damaged window screens, or visible water intrusion are present, the process often moves toward insurance notification, inspection scheduling, or both depending on how clearly conditions can be verified. When the extent of damage is uncertain, a professional inspection is often used to determine whether a claim is warranted before contacting the insurer. Documentation gathered during this period is referenced during adjuster inspections to compare observed conditions with what was present immediately after the storm. (NRCA guidelines)
Because storms along the Front Range can follow highly localized tracks, nearby properties are a useful reference point but not a final answer. Two homes on the same street can show different levels of impact depending on wind direction, hail size, and exposure.
First Priority: Ensure Safety Before Inspecting Damage
Wet roof surfaces, loose granules, and debris left behind after hail create unstable footing even after the storm appears to pass. Wind can still shift materials, and rain or low light can limit visibility during this period.
Stay on the ground. Look for specific hazards around the property, such as fallen branches, broken glass, displaced gutters, or downed power lines. Roof coverings may have been loosened by impact, and walking on them too soon can lead to slips or disturb areas that may later need to be evaluated during an inspection.
Wait until the storm has fully cleared and conditions have stabilized before checking for signs of impact. Ground-level observations provide enough information to determine whether further inspection is needed without introducing unnecessary risk. (OSHA safety guidelines)
Step 1 — How to Tell if Hail Hit Your Property From the Ground
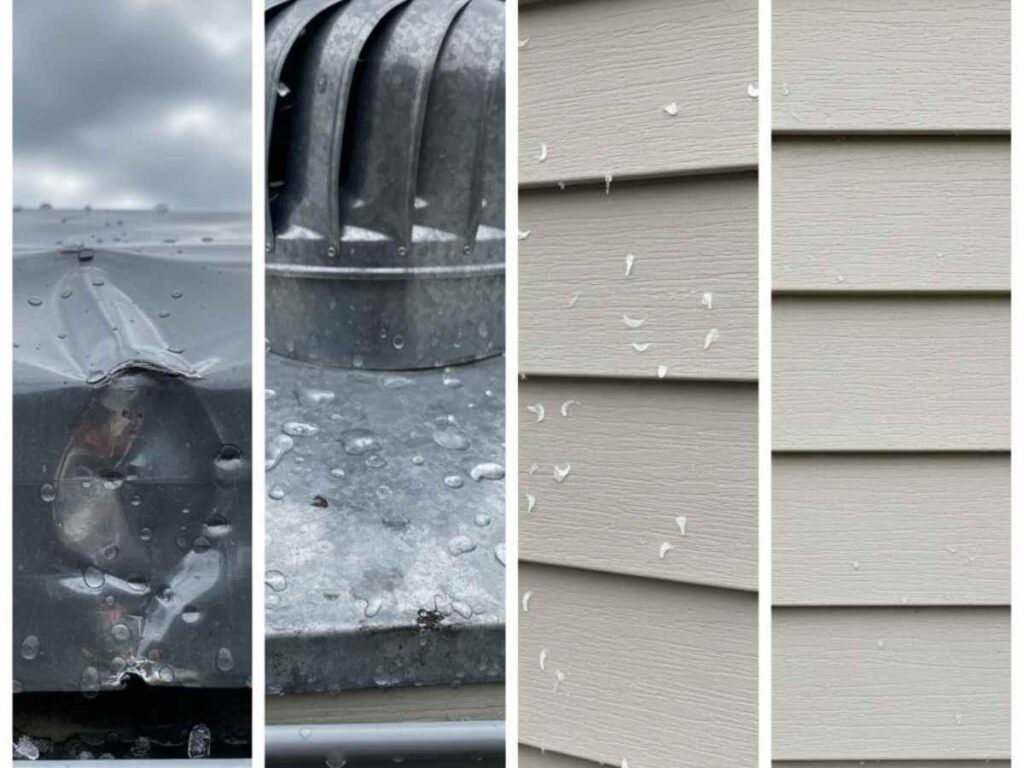
After a hail storm, the first visible signs usually show up on metal surfaces and exposed exterior materials around the property. Small dents in gutters or roof vents, or marks on siding and screens, can indicate that hail made contact, but they need to be interpreted carefully.
Start with materials that respond visibly to impact. Gutters, downspouts, roof vents, and flashing are made of softer metals that dent when struck with enough force. Look for round indentations or clusters of marks in the same general direction. Then check siding, window screens, and painted metal surfaces like garage doors or trim. Screens may show dimpling or small tears, and siding may have scattered marks that follow the path of the storm.
Nearby properties provide additional context. In Metro Denver, hail often follows narrow paths along corridors like I-25 or E-470, leaving one home with visible impact while another nearby shows little change. If multiple homes on your block show similar dents or surface marks, it increases the likelihood your property was within the storm path.
These ground-level indicators suggest that hail may have impacted the property, but they do not confirm the condition of the roof system. Shingle damage, underlayment issues, or flashing failures require closer inspection and are not fully visible from the ground. (NRCA guidelines)
Step 2 — If You See No or Minor Damage, What Should You Do Next?
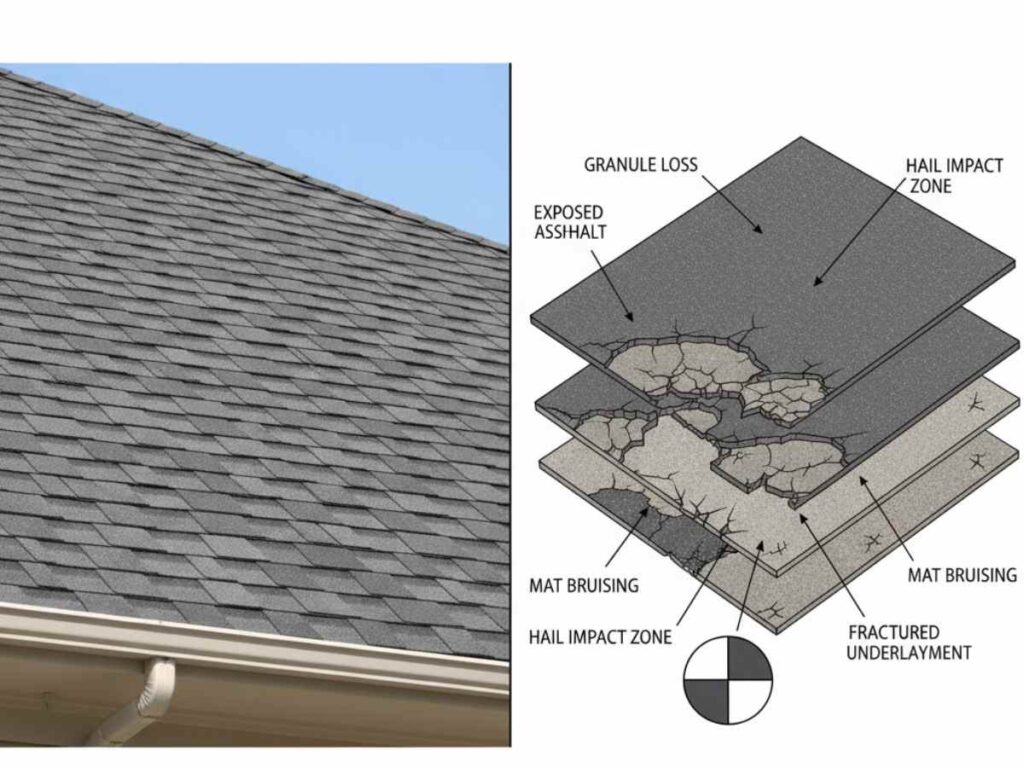
A roof can look unchanged after a hail storm, with no visible dents in gutters or only light marks on siding, and still have areas that may not show visible damage from the ground, especially when you understand how hail affects asphalt shingles.
Document the current condition while everything is unchanged. Take photos of rooflines, siding, gutters, and any areas that show little or no impact. These baseline images make it easier to compare if new symptoms appear later or if a professional inspection identifies damage that was not obvious at first.
Check the property again over the next 24–48 hours. Inside, look for moisture in attic spaces, ceiling stains, or insulation that feels damp. Outside, look near downspouts for granule buildup, new debris, or changes in areas that appeared unaffected immediately after the storm.
If conditions stay consistent and no new signs appear, continued monitoring may be reasonable. If new symptoms show up or the condition of the roof remains unclear, a professional inspection is used to determine whether damage is present and whether further action is needed.
Step 3 — If Damage Looks Serious, What Should You Do Next?
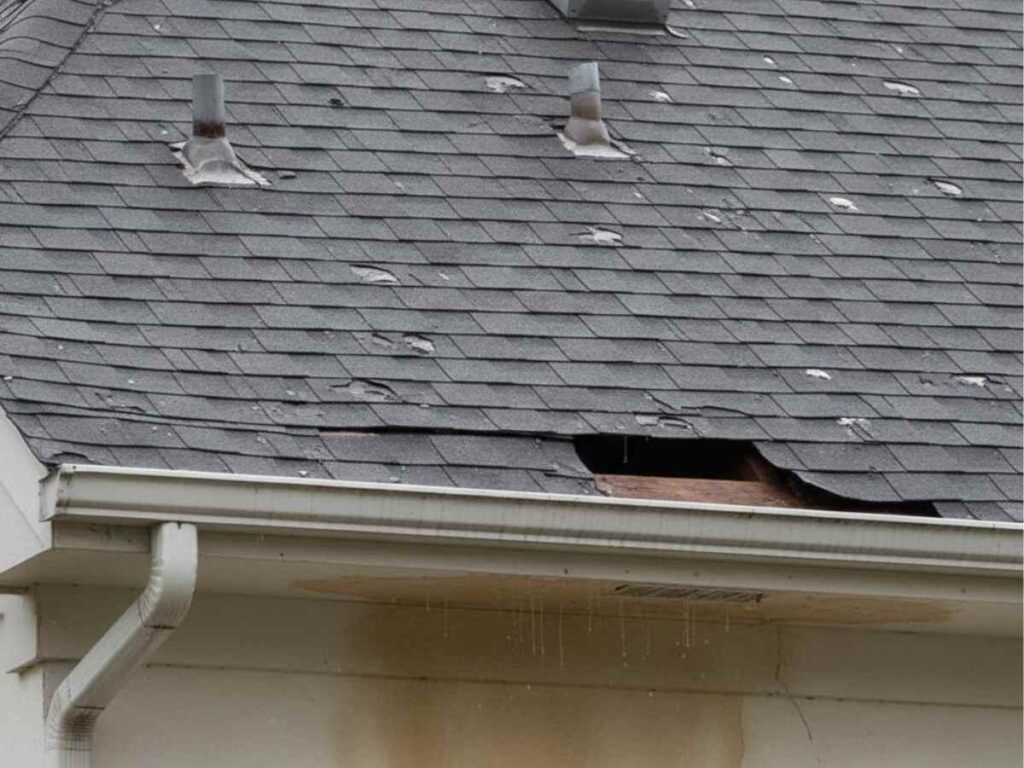
Water dripping from ceilings, shingles or tiles found on the ground, or dense denting across vents, gutters, and siding point to conditions where the roof may no longer be keeping water out effectively. These are signs of functional damage, where the issue goes beyond surface appearance and affects how the roof system performs.
In these situations, documentation and mitigation happen close together. Photos are typically taken first, capturing active leaks, displaced materials, and interior effects such as ceiling stains or wet insulation. Water is then contained inside the home, and temporary measures are used to limit further intrusion when they can be done without accessing the roof. This sequence helps preserve the condition of the damage while reducing additional water exposure.
When these types of conditions are present, the process often moves toward insurance notification, professional inspection, or both depending on how clearly the damage can be verified. The timing matters because active leaks and exposed areas can change quickly, and early documentation allows those conditions to be evaluated as they were immediately after the storm.
Step 4 — Capture Complete Damage Evidence From the Ground
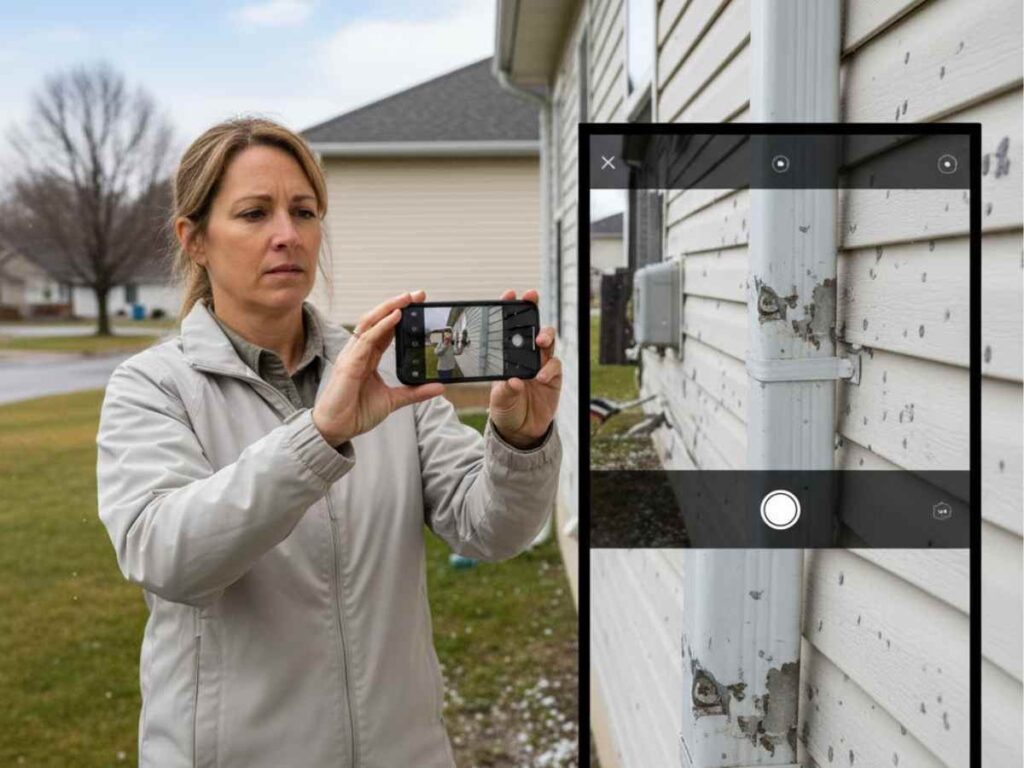
Standing outside after a hail storm, dents in gutters, marks on siding, or debris around the property can be documented immediately before anything shifts, dries, or is cleaned up. These early photos capture conditions as they actually appeared right after impact.
Photograph all visible surfaces, not just the most noticeable areas. Rooflines should be captured from multiple angles, along with gutters, downspouts, vents, and flashing where dents are more likely to appear. Siding, window screens, and painted metal surfaces such as garage doors should also be included. Extend documentation to other property features where impact may show, including HVAC units, vehicles, fences, decks, and skylights. Consistent patterns across these surfaces help show how the storm affected the property, not just isolated areas.
Keep photos organized and consistent. Take both wide shots and close-ups, and use similar angles if you revisit the same areas later. Preserve timestamps so each image can be tied to when the damage was observed. Recording the date and approximate time of the storm alongside the photos helps connect the documented damage to claim timing and inspection verification.
This documentation is used during inspections to compare observed damage with what was present immediately after the storm, especially if conditions change before the roof is evaluated. (NRCA guidelines)
Step 5 — Check Interior and Identify Active or Delayed Leaks
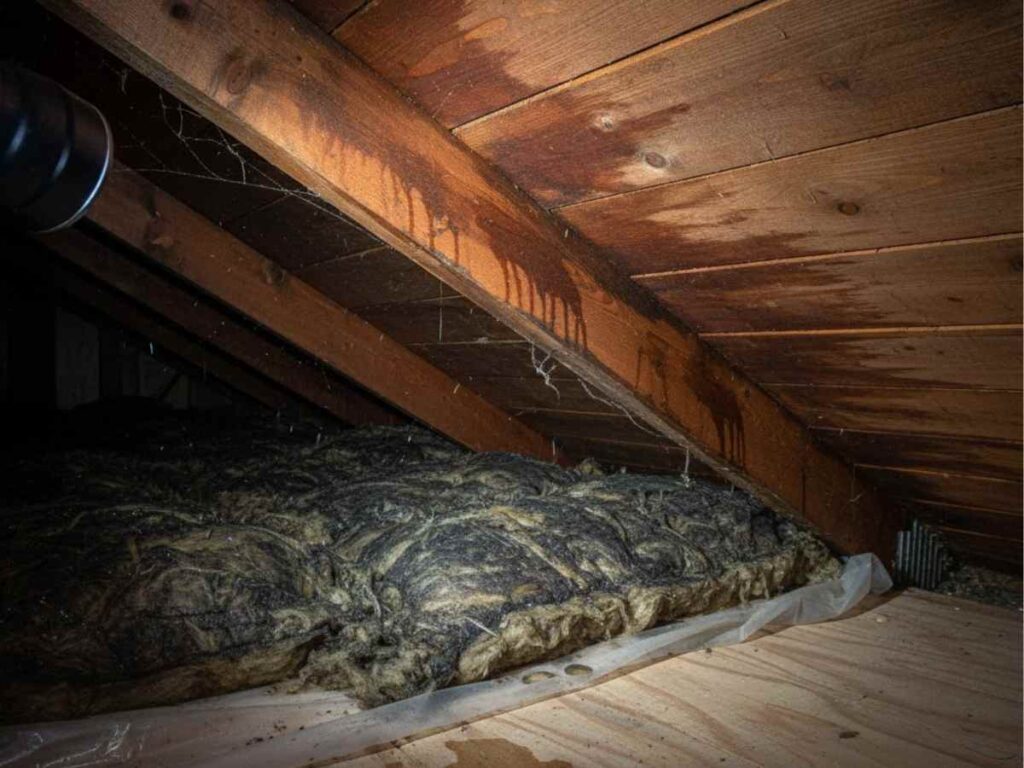
Water stains on ceilings, damp insulation in the attic, or dripping around light fixtures are signs that water has entered the home, but they do not confirm what caused it. After a hail storm, these conditions may be associated with damage to shingles, flashing, or roof penetrations, but they still need to be evaluated in context.
Check attic areas first if they are accessible. Look for wet insulation, darkened wood decking, or moisture tracking along rafters, nails, or fasteners. Water often follows these paths before it becomes visible inside the living space. Then inspect ceilings, especially in upper rooms, for discoloration, bubbling paint, or soft spots that indicate water absorption.
Active leaks show up as dripping, pooling, or clearly wet materials. Early or delayed signs are less obvious and may include faint stains, musty odors, or areas that feel damp without visible dripping. These conditions can appear hours after the storm as water moves through the structure.
Re-check the same areas over the following one to two days. Changes in staining, new moisture, or expanding affected areas indicate that water is continuing to move through the system and are typically evaluated through a professional inspection to determine the source.
Step 6 — Perform Temporary Mitigation and Preserve Evidence
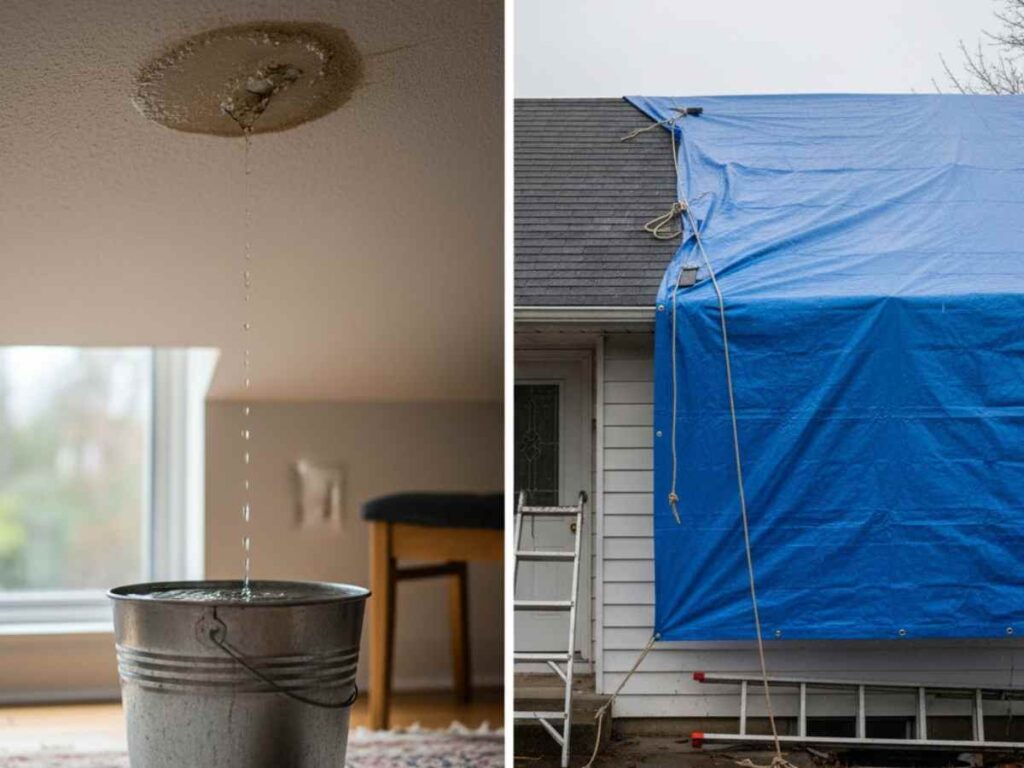
Water entering the home requires immediate containment to limit how far it spreads through ceilings, walls, and insulation. Buckets, towels, or redirecting water away from affected areas are common ways to manage active leaks while conditions are still unstable.
Temporary measures are used to reduce further intrusion without changing the underlying damage. Covering exposed areas with a tarp or plastic sheeting can help, but only when it can be done safely from the ground or without walking on the roof. Interior containment and exterior protection work together to slow additional damage while keeping the original conditions visible.
Keep a record of what is done during this stage. Save receipts for materials, take photos before and after temporary measures, and note when actions were taken. These details help show what conditions existed and what steps were taken to limit further damage.
Permanent repairs are typically delayed until the roof has been inspected and the condition of the damage has been evaluated. Early repairs can change or remove evidence that may be needed to understand how the roof was affected.
Step 7 — Decide Whether to Call Insurance or a Roofer First
Water actively entering the home or visible damage across multiple surfaces creates a different starting point than a roof that looks unchanged from the ground. The sequence depends on what can be confirmed at the time, not a fixed order.
When leaks are present or damage is clearly visible, insurance notification often happens early so the claim can be opened while the documented damage still reflects post-storm conditions. An inspection is then coordinated to document and evaluate the full scope of damage, often alongside the claim process.
When the extent of damage is unclear, a professional roof inspection is often used first to verify whether functional damage exists. Ground-level signs do not always reflect the condition of shingles, flashing, or underlayment, and inspection findings help determine whether involving insurance is appropriate.
In many cases, both processes move forward at the same time. A claim may be opened while an inspection is scheduled, allowing a contractor and an adjuster to evaluate the same conditions as they were documented after the storm. The sequence is based on how clearly the damage can be identified at the time decisions are being made.
Step 8 — Contact Your Insurance Company (Notice of Loss) and Understand What to Provide
Calling your insurance company or submitting a claim online is how a notice of loss is formally recorded once damage has been identified or needs to be evaluated through the claims process. This step may happen early when damage is clear, or after an inspection when the extent of damage has been verified.
The information provided at this stage reflects what was observed and documented after the storm. This typically includes the date and approximate time of the event, a description of visible damage or interior symptoms, and photos showing conditions as they appeared immediately after impact. These details are used to initiate the claim and begin coordinating the next steps, which is why it helps to understand how adjusters evaluate hail damage .These details are used to initiate the claim and begin coordinating the next steps, including inspection and adjuster review.
Keep a record of all communication. Claim numbers, adjuster contact information, and notes from phone calls or emails help track how the claim progresses and what information has been shared. This record is referenced as inspections take place and findings are compared against what was initially reported.
Insurance policies generally require prompt notice after damage is discovered, but the timing and requirements depend on the specific policy and carrier. (Colorado Division of Insurance regulations)
Step 9 — Understand Your Deductible and Coverage Before Moving Forward
Your deductible is listed in your policy documents and sets the amount you are responsible for before insurance applies. This number directly affects how much of the repair cost remains out of pocket, especially in hail-prone areas where percentage-based deductibles are common.
Coverage depends on how damage is defined and evaluated under the policy. Some policies limit or exclude cosmetic damage, where visible dents or marks do not affect how the roof system performs. In those cases, surface-level impact may not be included in the claim if the roof is still shedding water as intended. (Colorado Division of Insurance regulations)
Reviewing these details affects whether filing a claim makes financial sense. When estimated repair costs are close to the deductible, a claim may not significantly change total cost. When coverage is limited, inspection findings become important in determining whether damage is classified as cosmetic or functional, which affects how the claim is handled.
Step 10 — Schedule a Professional Roof Inspection With a Verified Local Contractor
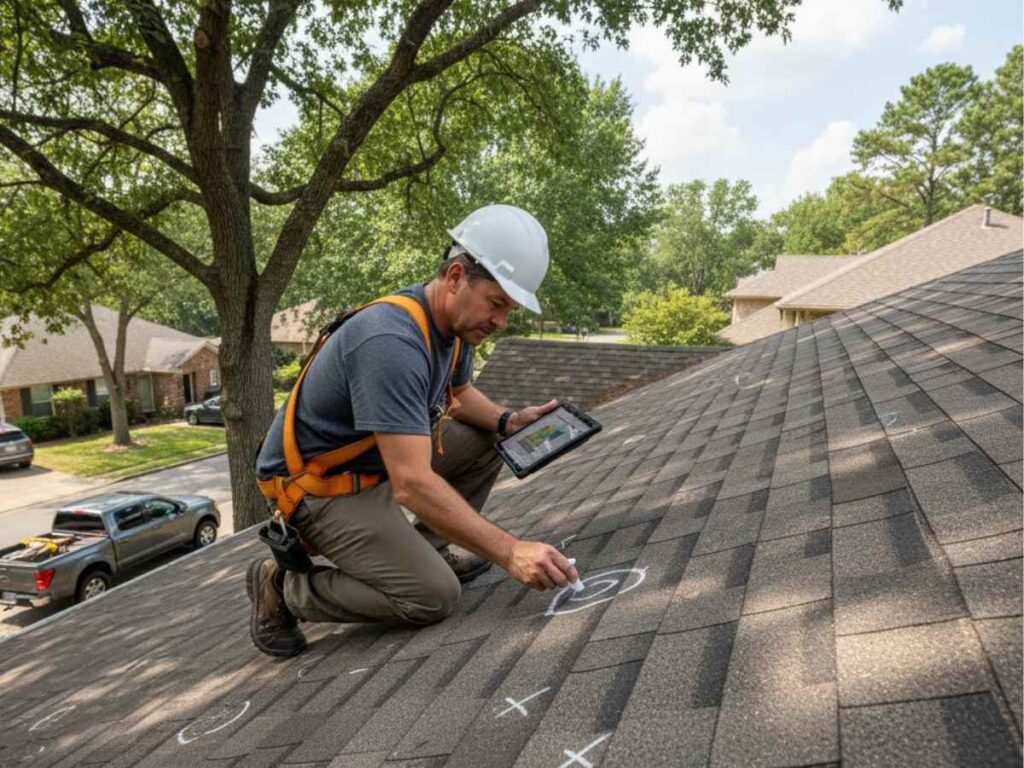
A roof can show minimal signs from the ground while still having damage at the shingle or flashing level that requires closer evaluation. A professional roof inspection is used to examine those areas directly and document conditions that are not visible from below.
In Metro Denver, contractor legitimacy is tied to local registration rather than a single statewide license. Roofing contractors are registered at the municipal or county level, so their status is tied to the jurisdiction where the work is performed. Local presence, active registration, and proof of insurance are part of how contractors are evaluated before an inspection is scheduled. (Colorado contractor licensing requirements)
Inspection findings are documented in detail. Photo-based reports show specific roof slopes, test areas, and locations where damage is identified. These images are used to compare roof conditions with earlier ground-level documentation and are often referenced during adjuster inspections to align what is observed across both evaluations.
This type of inspection creates a documented record of roof condition that is used to support claim validation and determine appropriate repair or replacement decisions.
Step 11 — Know Your Rights When Choosing a Contractor and Avoid High-Risk Agreements
After a hail storm, homeowners are often approached by contractors offering inspections or repairs, and some may suggest working directly through insurance or handling the process on the homeowner’s behalf. These situations are where contractor choice and agreement terms become important.
In most cases, the property owner selects who performs the work, even when an insurance claim is involved. That choice affects how damage is documented, how scope is developed, and how the project is carried out. Contractor availability, insurance requirements, and lender conditions can influence timing or process, but they do not automatically assign a contractor to the project. (Colorado Roofing Consumer Protection Act)
Door-to-door contractors are common after large storms across Metro Denver. Some are established and properly registered, while others may not have a verifiable local presence or active registration in the jurisdiction where the work is being performed. Contractors without a local track record can be difficult to reach later if workmanship issues arise or warranty follow-up is needed.
Certain agreements affect how much control remains with the homeowner. Contingency agreements or assignment-style contracts can commit the project to a contractor before the full scope of damage is confirmed. The terms in these agreements determine how the work proceeds, how payments are handled, and whether changes can be made after inspection findings are reviewed.
Understanding how contractor selection and agreement terms function helps keep decisions tied to verified damage and inspection results, rather than timing or early commitments.
Common Questions After a Hail Storm
What should I do immediately after a hail storm?
Start with what you can confirm right away. Check for safety issues, look for visible impact from the ground, and document any dents, marks, or debris before conditions change. If water is entering the home, contain it. Over the next 24–48 hours, monitor for delayed issues and decide whether inspection or insurance involvement is needed based on what develops.
How do I know if hail hit my house?
Dents in gutters, roof vents, or flashing, along with marks on siding or window screens, indicate that hail likely made contact. Similar impact on nearby homes can support that pattern, but roof condition still requires inspection to confirm.
What if I don’t see hail damage?
A roof may show no visible dents from the ground while still having damage at the shingle level. Document current conditions, then check again over the next 24–48 hours for moisture, stains, or granule buildup near downspouts. If conditions remain unclear, an inspection is used to verify whether damage is present.
How serious is hail damage?
Water entering the home, missing shingles, or dense denting across multiple surfaces points to functional damage. These conditions affect the roof’s ability to shed water and are evaluated differently than surface-level marks that do not change performance.
How do I document hail damage?
Use photos taken immediately after the storm, before debris is moved or surfaces dry. Capture rooflines, gutters, siding, windows, and other exterior features, along with HVAC units and surrounding property. Include both wide views and close-ups with timestamps so conditions can be compared during inspection.
What if my roof is leaking after hail?
Water dripping inside or wet insulation in the attic is contained first to limit spread. Buckets, towels, or redirecting water help manage active leaks, while temporary coverings such as tarps are used if they can be placed safely. Photos are taken before and after mitigation so original conditions are preserved.
Should I call insurance or a roofer first?
Active leaks or clearly visible damage often lead to early insurance notification so the claim can be opened while conditions still reflect post-storm damage. When damage is not clear, an inspection is used first to determine whether involving insurance is appropriate. In many cases, both processes move forward at the same time.
What do I need when filing a hail claim?
Provide the date and approximate time of the storm, photos showing conditions after the event, and a description of what was observed, such as dents, debris, or interior moisture. Claim numbers and communication records are kept as inspections and evaluations move forward.
What does insurance cover for hail damage?
Coverage depends on how damage is classified under the policy. Damage that affects how the roof performs is evaluated differently than cosmetic denting or surface marks. Deductibles and exclusions determine how repair costs are divided between the homeowner and the insurer.
Do I need a roof inspection?
When the roof looks unchanged from the ground but uncertainty remains, an inspection is used to examine shingles, flashing, and penetrations directly. The findings document whether functional damage is present and how it is classified.
Can I choose my own contractor?
After a storm, homeowners may be approached by contractors, but the property owner typically selects who performs the work. That choice affects how damage is documented, how scope is developed, and how contract terms allow changes based on inspection findings or claim adjustments.
How do I avoid roofing scams?
Door-to-door contractors without a verifiable local presence or proper registration are higher risk, especially after large storms. Agreement terms, including contingency or assignment-style contracts, determine whether the homeowner can change contractors, adjust scope, or retain control over payments.
Can hail damage be hidden?
Granule loss or underlying shingle damage may not be visible from the ground. Leaks can also develop hours later as water moves along decking or fasteners before reaching interior surfaces.
Can I repair damage before inspection?
Temporary measures limit further damage, but permanent repairs are usually delayed until after inspection. Early repairs can remove or alter conditions that are used to evaluate the roof.
What happens if I wait to file a claim?
Policy timelines for reporting damage begin once it is discovered. Waiting can make it harder to match current conditions to what existed immediately after the storm, especially if surfaces change or temporary work has been done.
How These Steps Fit Together After a Hail Storm
Dents in metal, marks on siding, or water showing up inside the home determine whether the next step is monitoring, inspection, or claim initiation. What is documented and stabilized in the first 24–48 hours is what later inspections and claim evaluations rely on, especially if conditions change or temporary work is done.
Some properties show clear functional damage, such as leaks or displaced materials. Others show little from the ground and require monitoring or inspection to determine whether the roof system was affected. The outcome depends on what can be verified visible impact, moisture intrusion, and how materials respond after the storm.
If uncertainty remains, the next step is usually deeper evaluation. That may include how hail affects different roofing materials, how inspectors classify damage during an assessment, or how claim decisions are made once documentation and inspection findings are reviewed.
Recent Comments